I love Easter, and it is always a great time to enjoy with everyone. One of the best ways to share the joy of Easter is through DIY Resurrection Eggs and Easter storybooks. Combining Easter and DIY can be really fun and a great way to spend your time on. Imagine seeing the happy looks on your kids’ faces when they found out you made all these.
To make your job easier, I want to share with you my recipes and printable that you can use to make your very own Resurrection Eggs and Easter Story Books. Furthermore, I make sure that these recipes and printable can be easily customized and edited according to your taste.
DIY Resurrection Eggs
Telling the story of Easter can’t be easier than using Resurrection Eggs, especially with DIY ones. You can make them for cheap and quickly while having a lot of fun in the process. Of course, you can involve everyone too.
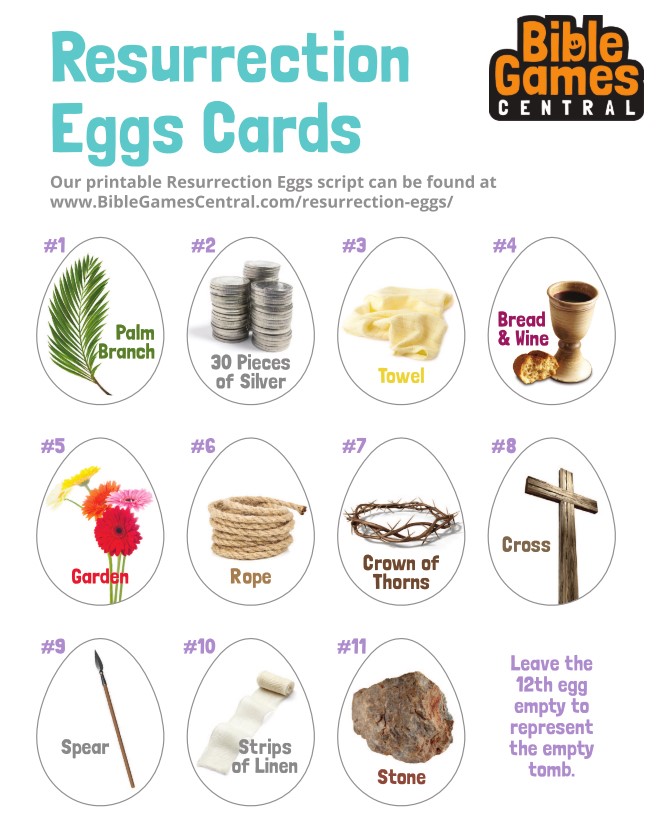
To create all the eggs, you need to use certain items to represent all the items that are related to the story of Easter:
- Any small leaf. This leaf is used to represent the leaves that people of Jerusalem spread to welcome Jesus.
- 1-5 silver coins. These coins are used to represent the 30 pieces of silver received by Judas to betray Jesus.
- A piece of terry cloth. This piece of cloth is used to represent the towel that Jesus used to clean his disciples’ feet. A small piece of terry cloth will do.
- A very small communion cup to tell story of the Last Supper.
- A flower to replace the beautiful Garden of Gethsemane.
- A piece of string to represent the rope that bound Jesus after he was arrested.
- A small stem of any plant to picture the crown of thorns that was put on Jesus’ head.
- One small cross to represent the crucifixion.
- A small toothpick to represent the spear used to pierce Jesus. Dip the tip in red paint to make them look better.
- A small strip of cloth to represent the strips of linen used to cover Jesus’ body.
- A small stone to represent the stone that was placed in front of Jesus’ tomb’s entrance.
- An empty plastic egg to represent the empty tomb.
- 12 plastic eggs of course.
And, you can also download my printable and print it. Then, cut the pictures and paste them on the plastic eggs.
The printable to make the process simpler
Before you download this picture to be printed later for your plastic eggs, you can consider the option to design everything yourself. This is a great chance to let your creativity runs free. Or even better, let your family decide the best pictures to use.
Otherwise, you can always download this picture and print it. Cut the pictures, and nicely paste them on the eggs.
Putting everything together
After you get everything ready, now it’s for the assembly. To make it easier for everyone, make sure you have printed the printable, cut all the pictures, and pasted them on the eggs. Now, you can put each item mentioned above in each egg. Make sure that each item goes inside the corresponding egg. You can also use a marker to put a number on each egg from 1 to 12.
Easter storybook
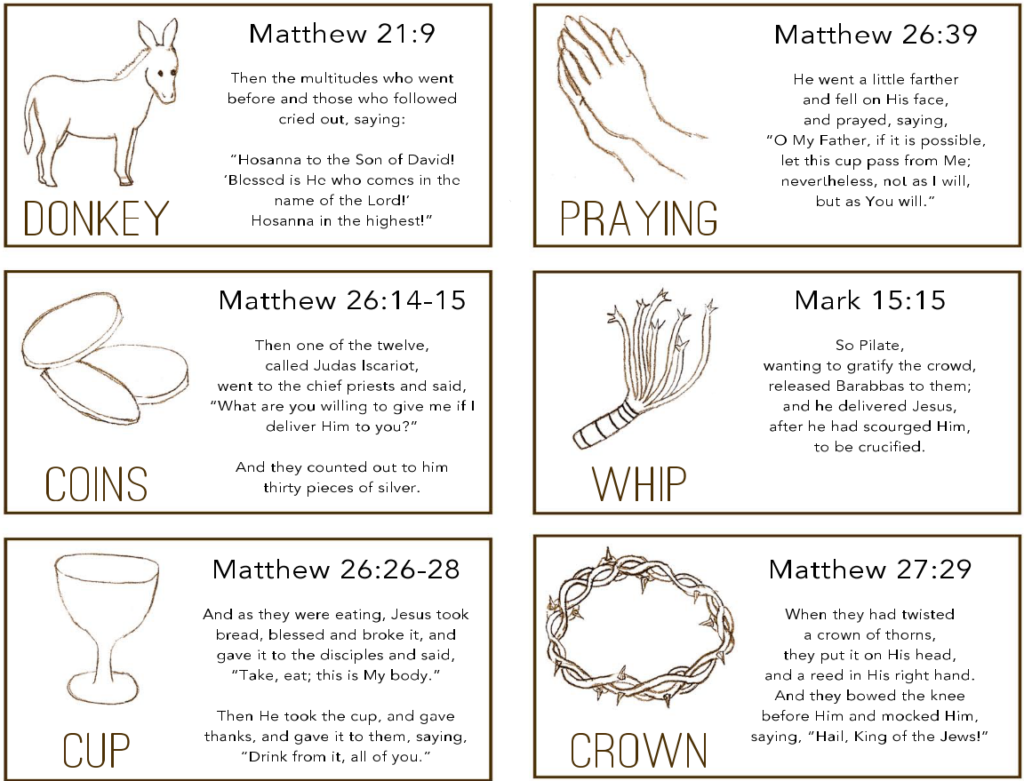
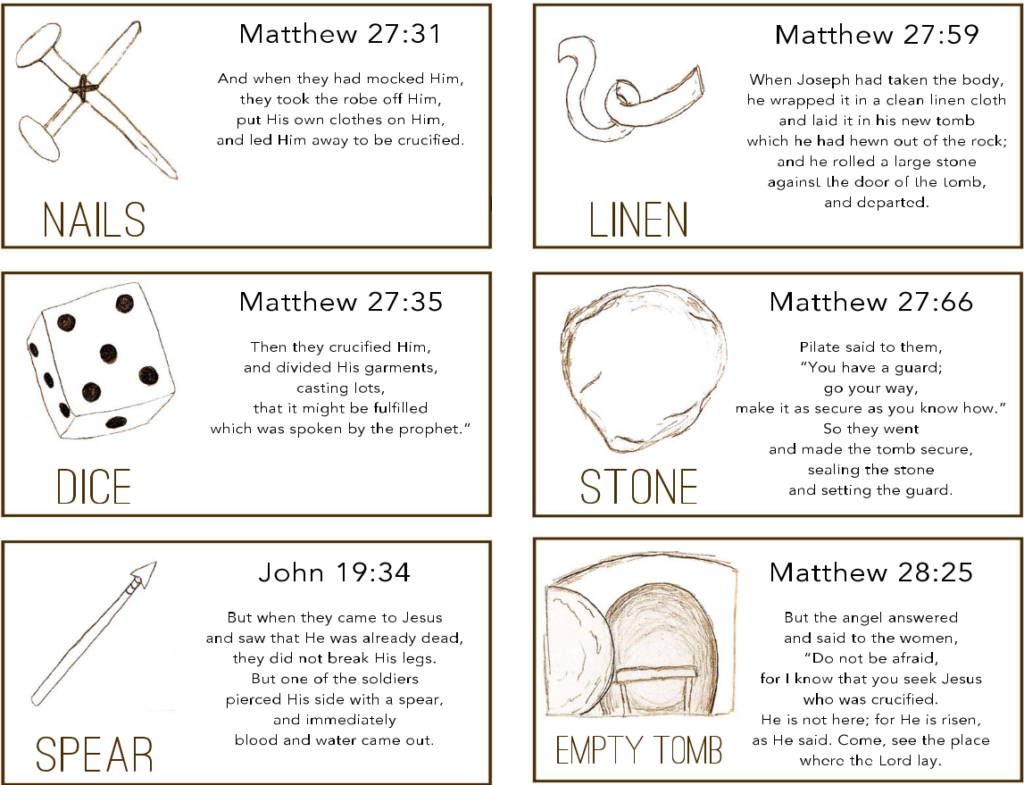
As for the storybook, you can download the printable below and print it. Cut each story and stack paper on top of each other and create a deck of story cards. Don’t forget to put them to help you tell the story properly.
You don’t have to read or remember the story in its entirety. Learn how to paraphrase the story, so you’ll be able to tell the story again next year and still able to keep it fresh. You can also put colors in the storybook if you want to. See which colors are best for each story, and perhaps you can make Easter more interesting that way.
It’s time to tell the story
After you’ve prepared everything, now it’s showtime. Put the eggs in order and tell everyone to open them one by one as you tell them the story of Easter. See how everyone will react to your representation of the story. Use this experience to find a way how to improve and make Easter even better next year.

